Recognizing faces in large batch
The goal of this guide is to explore some of the main wmp-face tools on a
single task: recognizing all the faces in a batch of images
In this tutorial, we will see how to:
- load all images of your persons-of-interest
- extract feature vectors of your persons-of-interest and store for future use
- load all images you want to analyze
- perform face detection and recognition on images
- verify results of face algorithms by hand
Tutorial setup
To get started with this tutorial, you must first install wmp-face and all of its required dependencies. Please refer to the installation instructions page for more information and for system-specific instructions. The source of this tutorial can be found on Github.
The data we will be using are 1) images of renowned politicians grabbed from Google images to be used as reference photos and 2) a small sample of Facebook political ads which we will be using to illustrate how effective the face recognition algorithm is. Check out this short video for a quick overview of face detection and face recognition.
Loading images of your persons-of-interest
To be able to recognize a face in an image we haven’t seen before, we need to have photos of our persons-of-interest (i.e. reference photos).
In the following, we will use the built-in dataset loader from wmp-face:
>>> from wmp.datasets import fetch_referenceportraits
>>> images_filepaths = fetch_referenceportraits()
The returned object is a list of file paths to our reference portraits:
>>> images_filepaths
['data/ref/Bernie_Sanders.jpg', 'data/ref/Donald_Trump.jpg',
 'data/ref/Hillary_Clinton.jpg', 'data/ref/Marsha_Blackburn.jpg']
We can now load the list of files into FaceImage objects which will allow
us to store the image data and eventually detect all the faces contained in the
image:
>>> fromp wmp import detect
>>> images = [detect.FaceImage(i) for i in images_filepaths]
>>> images[3].show()

Extracting and storing features of your persons-of-interest
Now that we have all our reference photos loaded, we need to 1) detect where
exactly in the photo a face is located and 2) encode the found face into an
n-dimensional vector understood by our recognition algorithm. These are handled
by our FaceDetector object.
Let’s detect and encode a face in a single reference photo:
>>> fd = detect.FaceDetector()
>>> image1 = images[3]
>>> len(image1.faces)
0
>>> image1 = fd.find_faces(image1)
>>> len(image1.faces)
1
We have found 1 face in the image. Notice that find_faces() method takes
a FaceImage as an argument and returns a modified FaceImage that has a
faces attribute. The faces attribute is a list of Face objects.
Let’s explore a single Face
>>> face1 = image1.faces[0]
>>> face1
Face(source_name=data/ref/Marsha_Blackburn.jpg,box=Box(top=376,left=1274,bottom=761,right=1659))
>>> face1.encoding
[ -0.10275392  0.05789899  0.1129996  -0.09764827 -0.08509253  0.00112197
  0.05602    -0.04875868  0.16560641 -0.083772    0.16726318 -0.08173679
  ... ]
>>> face1.encoding.shape
(128,)
>>> face1.show()

Now that we have a better handle on what FaceDetector does, let’s repeat
find_faces() over all our reference photos.
>>> faces = [fd.find_faces(i).faces[0] for i in images]
>>> faces
[ Face(source_name=data/ref/Bernie_Sanders.jpg,box=Box(top=231,left=200,bottom=498,right=468)),
  Face(source_name=data/ref/Donald_Trump.jpg,box=Box(top=872,left=798,bottom=1538,right=1463)),
  ... ]
Next, lets turn the list of Face into a reference FaceBatch and save
for future use.
>>> reference_batch = detect.FaceBatch(faces, is_reference=True)
>>> len(reference_batch.faces)
4
>>> reference_batch.encodings.shape
(4, 128)
>>> reference_batch.true_names
[ Bernie_Sanders, Donald_Trump, Hillary_Clinton, Marsha_Blackburn ]
>>> reference_batch.save("data/reference_encoded")
Pay close attention to the attributes of our FaceBatch. We had four
reference photos. Therefore, we expect our FaceBatch to have four faces,
four encodings and four names.
Output folder structure
Finally, we will examine the folder structure of our saved reference
FaceBatch. reference_batch.p is our previous FaceBatch object that
contains the names and encodings from our reference photos. We will be loading
this object into our FaceRecognizer.
A copy of each of our reference photos (now named _reference.jpg) has been placed into a folder of the same name. Additionally, the folders No_Person and Unknown have been created. We will be using these pictures and folders when we verify the face results:
reference_encoded
│   reference_batch.p
│
├───Bernie_Sanders
│       _reference.jpg
│
├───Donald_Trump
│       _reference.jpg
│
├───Hillary_Clinton
│       _reference.jpg
│
├───Marsha_Blackburn
│       _reference.jpg
│
├───No_Person
└───Unknown
We’re now ready to recognize faces in new images!
Loading images for analysis
Let’s load in our new images using the built-in dataset loader from wmp-face.:
>>> from wmp.datasets import fetch_facebookads
>>> images_filepaths = fetch_facebookads()
The returned object is a list of file paths to our images:
>>> images_filepaths
[ 'data/fb/106600513605104.jpg', 'data/fb/172300446975609_sshot.jpg', ... ]
We can now load the list of files into FaceImage objects which will allow
us to store the image data and eventually detect all the faces contained in the
image:
>>> fromp wmp import detect
>>> images = [detect.FaceImage(i) for i in images_filepaths]
>>> images[7].show()
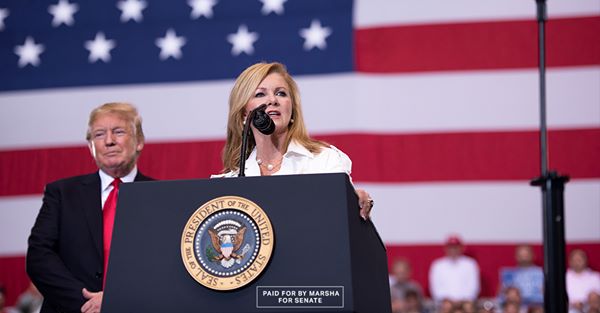
Performing detection and recognition
Let’s detect and recognize faces in a single photo:
>>> fd = detect.FaceDetector()
>>> fr = detect.FaceRecognizer("data/reference-encoded")
>>> image1 = images[7]

>>> image1 = fd.find_faces(image1)
>>> image1 = fr.predict_names(image1)
>>> image1.retrieve_names()
[ Donald_Trump, Marsha_Blackburn ]
>>> image1.write_faces("data/outfaces")
We’ve detected and recognized two faces. To visualize the results, we see the folder data/outfaces will contain:
outfaces
    Donald_Trump_0.jpg
    Marsha_Blackburn_1.jpg


Now that we understand what FaceRecognizer does, let’s repeat
predict_names() across all our photos:
>>> images = [fd.find_faces(i) for i in images]
>>> images = [fr.predict_names(i) for i in images]
>>> names = [i.retrieve_names() for i in images]
[ ['Donald_Trump', 'Marsha_Blackburn'], [], ['Unknown', 'Bernie_Sanders'], ... ]
>>> fr.write_validation(images, "data/outfaces")
To visualize the results, we see the folder data/outfaces will contain:
outfaces:.
│   reference_batch.p
│
├───Bernie_Sanders
│       172300446975609_image_1.jpg
│       172300446975609_sshot_1.jpg
│       _reference.jpg
│
├───Donald_Trump
│       1048748175284984_image_0.jpg
│       1048748175284984_sshot_0.jpg
│       372009193308190_image_1.jpg
│       _reference.jpg
│
├───Hillary_Clinton
│       _reference.jpg
│
├───Marsha_Blackburn
│       1048748175284984_image_1.jpg
│       1048748175284984_sshot_1.jpg
│       _reference.jpg
│
├───No_Person
│       1048748175284984_sponsor.jpg
│       270469526847559_image.jpg
│
└───Unknown
        106600513605104_image_0.jpg
        106600513605104_image_1.jpg
        106654180210343_image_0.jpg
        106654180210343_image_1.jpg
        106654180210343_image_2.jpg
        106654180210343_image_3.jpg
        172300446975609_image_0.jpg
        172300446975609_sshot_0.jpg
        372009193308190_image_0.jpg
We’ve completed recognizing all the faces in these images! Now its time to validate the results